Sunday, April 14, 2013

Review Elegant Spa & Studio Hair cut - Post sobre o Salão Elegant Spa & Studio


   I just got my hair cut for the first time since I moved back to Canada, and was feeling pretty overwhelmed by it. It took me years to find a decent hairdresser in Portugal, they either cut way too much or just did a sloppy job, so I was thinking it was going to happen here too, but it didn't! This hairdresser is a keeper! It's called Elegant Spa & Studio and they are located on Rogers Road, they have fair prices and the salon itself is beautiful, they also speak Portuguese for those who are interested! Check them out on Facebook here.
***
   Cortei o meu cabelo pela primeira vez desde que me mudei para o Canadá, e estava me a sentir muito oprimida, pois demorei anos para encontrar um cabeleireiro decente em Portugal, ou cortavam demais ou apenas faziam um trabalho desleixado.Por isso pensei que fosse passar pelo mesmo dilema aqui também, mas isso não aconteceu! Esta cabeleireira é o máximo! O salão chama-se Elegante Spa & Studio e estão localizados na Rogers Road, e têm preços justos e o salão em si é lindissímo, eles também falam Português para aqueles que estão interessados! Veja o Facebook deles aqui.


   Remember the post about my hair? I was going to get rid of my layers but instead had more done, the hair dresser Sandra recommended I try it, and even though I was a little hesitant, I did, and loved it!! She also straightened my super curly hair and it stayed pin straight for 3 days!

***

   Recorda-se do post sobre o meu cabelo? Entrei no salão para se livrar das minhas camadas mas em vez disso, ainda coloquei mais! A cabeleireira Sandra recomendou que eu experimentá-se e apesar de eu estar um pouco hesitante, eu fiz, e adorei! Ela também esticou o meu cabelo super encaracolado e permaneceu lisinho durante 3 dias!


   I'm definitely going back in about 3 months or so for another trim! I payed 40$CAD for a trim (adding layers also) , and straightening. I was in and out in about an hour. So if you're looking for something fairly cheap in the west end of Toronto, try this salon!

***

   Definitivamente irei voltar em torno de 3 meses ou mais para cortar umas pontas! Eu paguei 40 $CAD para cortar as pontas (fiz mais umas camadas), e estiquei o cabelo. Entrei e saí em cerca de uma hora. Por isso, se estiver à procura de algo relativamente barato no extremo oeste de Toronto, tente este salão de beleza!

Wednesday, April 10, 2013

Lush Caca Brun Henna Done on Brunnette - Henna da Lush Caca Brun Feito em Cabelo Castanho (LUSH)

   After a long time of hesitation, doubt and fear, I finally purchased the Henna Dye at Lush, in the color Caca Brun Mama. You might be thinking, why buy a Henna the same color as your natural hair color? Well, that's because I want to play it on the safe side for now and I'll also be using the Henna as an intense conditioning treatment for my hair, as the Henna is meant to leave your hair feeling softer, stronger, undamaged, and of course dyed.

***

  Após um longo período de dúvida, de hesitação e medo, finalmente comprei o bloco de Henna na Lush, no tom Caca Brun. Poderá estar a pensar, porquê comprar um bloco de Henna do mesmo tom que a sua cor natural? Bem, isso é porque quero jogar pelo seguro no que toca a cor e também porque vou usar a Henna como um tratamento intensivo para o meu cabelo, pois a henna destina-se a deixar o seu cabelo mais suave , mais forte, nada danificada, e naturalmente tingido.


Lush has four different Henna colors available:
  • The Caca Brun Mama -  Considered the most subtle of the four, choose Caca Brun for sleek, beautiful hair with rich, dark brown tones. Brunettes can use Caca Brun for its fantastic conditioning and shine inducing properties without seeing a drastic change to their natural color.
  • The Caca Marron Mama -  Caca Marron is the perfect henna for anyone who's looking for a vibrant red, but isn't quite brave enough to take the plunge just yet. Instead, it will ease you in gently with the perfect balance of daring red and a more modest rich brown.

  • The Caca Rouge Mama -  Caca Rouge is the reddest Lush's henna dyes and it’s sure to get you noticed. Great for redheads.
  • The Caca Noir Mama -  This Henna has deep blue indigo hues to leave hair soft, glossy, and deeply conditioned. If you have dark hair, you’ll end up with a rich blue-black tint that blends magnificently with reddish hues.
   NOTE: You can mix the Henna to your liking, for example you can mix 3 squares of Caca Brun Mama with 1 square of Caca Marron Mama, to achieve a chestnut brown tone.

***

Henna da Lush tem quatro tons disponíveis de Henna:
  • A Caca Brun - Considerada a mais subtil dos quatro, escolha Caca Brun para obter um cabelo lustroso, bonito, com tons escuros de castanho. As morenas podem usar Caca Brun pela sua hidratação de brilho fantástico e propriedades indutoras sem ver uma mudança drástica na sua cor natural.
  • A Caca Marron - Caca Marron é a perfeito para quem está à procura de um vermelho gritante, mas não é corajoso o suficiente para mergulhar de cabeça. Em vez disso, vai facilitar-lhe esse mergulho com o equilíbrio perfeito de vermelho ousado e um castanho mais modesto .
  • A Caca Rouge - Caca Rouge é a mais vermelha das Henna da Lush e certamente fará com que reparem em si. Excelente para as ruivas.
  • A Caca Noir - Esta Henna tem tons azul índigo profundas para deixar o cabelo macio, brilhante e profundamente hidratada. Caso tenha cabelo escuro, vai acabar com uma tonalidade rica em azul e preto que combina maravilhosamente com tons avermelhados.

    NOTA: Pode misturar a Henna a seu gosto, por exemplo, pode misturar 3 quadrados de Caca Brun com 1 quadrado de Caca Marron , para alcançar uma tom acastanhado com toques avermelhados.


    Don't think that once you've chosen your color(s) you're good to go, you'll need to round up a few tools so the whole process won't be such a mess.
     First things first, Henna is a stain, so you should choose to work in an area that is manageable and lay newspaper all over the floor. 
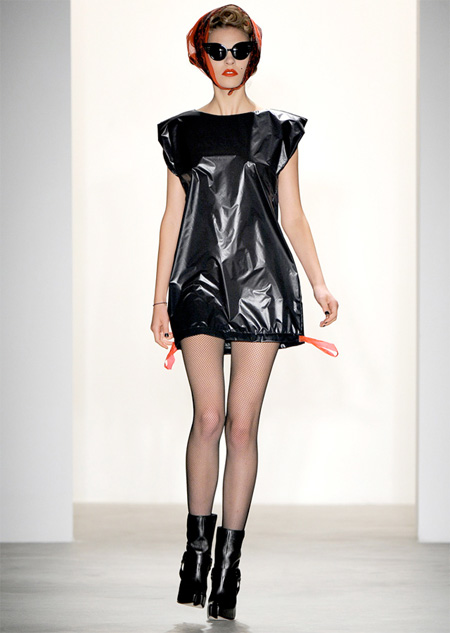
   You should also make sure the clothes you have on is something you don't mind staining, to avoid this I decided to Make a garbage bag cape, so If I get anything on my clothes it'll mostly be my sleeves. It's as simple as poking a hole (for your head) at the closed end of the bag. It will probably look something like this, but maybe not as high fashion :)

 ***
   Não pense que uma vez que já escolheu a(s) sua(s) cor (s) que está pronto para começar,vai precisar de reunir alguns itens para que todo o processo não seja uma autêntica bagunça.
    Primeiro de tudo, Henna mancha,por isso deve optar por trabalhar numa área que seja manejável e colocar jornal por todo o chão.
   Também deve certificar-se que as roupas que trás no corpo é algo que não se importa de de manchar, para evitar isso, decidi fazer um capa a partir de um saco de lixo, assim se eu manchar alguma coisa será maioritariamente as minhas mangas. É tão simples quanto abrir um buraco (para a cabeça) na extremidade fechada do saco. Provavelmente vai ser algo deste género, mas talvez não tão cheia de estilo :)


   Next and one of the most important in my opinion Strand Test! If you want to be safe and know what your hair will look like you should definitely do this, you don't want to end up with a horrible color that will not be dye able at your local hair salon, you'll have to grow out the colored hair, so be careful, better safe than sorry! Cut a Lock of your hair, enough to see a color difference, make sure you secure the hair with something like an elastic or you will lose all the strands. Apply the Henna all over the hair lock, and wait at least 4 hours, or the time you plan to have the henna in your hair. Wash it all out, dry the lock and make your decision! Scroll all the way down to check out my strand test.

***
   O seguinte e um dos mais importantes na minha opinião, O Teste da Mecha! Caso queira ser segura e saber antemão qual a sua cor de cabelo após a Henna , deverá definitivamente fazer isto, não quer acabar com uma cor horrível que não ser capaz de pintar no seu cabeleireiro local, terá de crescer o cabelo, por isso tome cuidado, é melhor prevenir do que remediar! Corte uma mecha do seu cabelo, o suficiente para notar uma diferença de cor, certifique-se de proteger a mecha com algo como um elástico senão irá perder todos os fios. Aplique a Henna em toda a mecha de cabelo, espere pelo menos 4 horas, ou o tempo que pretende ter a henna no seu cabelo. Lave bem, seque a mecha e certifique-se que quer seguir com o processo. O meu teste está no final do post.
It is important you gather all the items before hand so there is no unnecessary moving during the process. You will need:
  •  Your Henna Block (preferably cut into pieces or grated);
  • A medium sized bowl;
  •  Boiling water;
  •  Something to stir;
  •  Rubber gloves (Look for the thick cleaning type, if you have long nails like me, the thin ones will rip and stain your fingernails);
  •  Vaseline (This will be used along your hairline, ears and neck. The product will help create a wall between your hair and your skin, so no staining of the skin will occur);
  •   I recommend a hair dye brush for easy application.

É importante que reuna todos os itens antes previamente para que não haja movimento desnecessário durante o processo. Vai precisar de:
  • Seu bloco Henna (de preferência cortado em pedaços ou ralado); 
  • Uma tigela de tamanho médio;
  • Água fervente; 
  • Algo para mexer; 
  • Luvas de borracha (Procure do tipo de limpeza pois são mais espessas, se tiver unhas compridas como eu, as finas vão rasgar e manchar as suas unhas); 
  • Vaselina (Isto será usado ao longo sua linha de cabelo, orelhas e pescoço. O produto irá ajudar a criar uma barreira entre o seu cabelo e a sua pele, para que não ocorra manchas na pele); 
  • Recomendo um pincel de tintura de cabelo para uma fácil aplicação.

   Relax, you're almost ready to start dyeing your hair, just a few more important notes before hand!
  1.  Chosen your Henna color(s); 
  2. Done a Strand Test; 
  3. Chose an  appropriate work space and covered everything with newspaper, as well as wear old clothing; 
  4. Round up all the tools you're going to need; 
  5. Figured out how many squares of Henna you will need. (If your hair is long and curly like mine, a whole block of henna should be enough, If it's about jaw length, 3 or 4 should do it);
    ***

    1. Escolheu o(s) ton(s) de Henna;
    2. Feito um teste de mecha;
    3. Escolheu um local de trabalho adequado onde esteja tudo coberto com jornal, bem como vestir roupas velhas;
    4. Reúna todas as ferramentas que irá precisar;
    5. Descoberto quantos quadrados de Henna vai precisar. (Se o seu cabelo for comprido e encaracolado como o meu, um bloco inteiro de henna deve ser suficiente, se é curto na zona do queixo, 3 ou 4 deve chegar);

            My Strand Test

    For my strand test I used about a tablespoon of the henna and very little water to get that nasty looking paste, the applied it all over the strand of hair I cut off and waited 6 long hours. The results? Are just below, I personally think the color didn't change much, it's a little lighter, but the strand is so smooth and fluffy I just wanna touch it all day! On the top picture although the image has a lot of light, it's slightly away from the natural sunlight. It seems hardly lighter than the original hair color. The bottom picture is where you can tell most of the color difference, it was taken with plenty of natural sunlight. The part with the red arrow is the one that wasn't dyed.

***

   Para o meu teste de mecha usei cerca de uma colher de sopa da henna e muito pouca água para obter uma pasta desagradável e mal cheirosa . Apliquei por toda a mecha de cabelo que cortei e esperei 6 horas Os resultados? Estão em baixo, pessoalmente acho que a cor não mudou muito, está um pouco mais clara, mas a mecha está tão suave e macia quero tocar-lhe o dia todo! Na imagem de cima, embora a imagem tenha imensa claridade está um pouco afastada da luz natural. É difícil de notar uma diferença entre o original e pintado.A imagem por baixo dessa é onde se nota differença entre os dois tons, a foto foi tirada com bastante luz natural. A parte com a seta vermelha é aquela que não foi tingida com a henna.


   I was initially going to dye it on my own, courageous right? But a friend offered to dye it for me and well I gladly accepted. We started off by smashing the henna in a bag, because grating it would take forever since I would be using the whole block. Then we kept adding water until it looked pretty much like yogurt but not as runny, I can't tell you exactly how much we used but I'm going to guess 1/2 or so is enough. I then applied Vaseline all over my hairline, neck and ears, it felt gross but didn't want to regret the henna staining my skin! Once we were done, I was rocking the Marge Simpson inspired hairdo!
***


   Inicialmente ia applicar a henna sozinha, algo corajoso né? Mas uma amiga se ofereceu para fazê-lo por mim e eu aceitou de bom grado. Começamos por esmagar a henna num saco, porque ralar todo o bloco levaria uma eternidade uma vez que usei o bloco inteiro. De seguida fomos adicionando água até que tivesse a consistência de um iogurte, mas não líquido, não lhe posso dizer exactamente quanto usamos, mas vou apostar num copo e 1/2, talves será o suficiente. Coloquei vaselina por toda minha testa, pescoço e orelhas, era um pouco sebosa, mas não quis lamentar caso a henna manchasse a minha pele! Uma vez que nós terminamosparecia que tinha um penteado inspirado na Marge Simpson inspirado !


   Would I do it again? Probably not, I only bought the henna for it's amazing conditioning and even though Lush's product achieved that, for me it's not worth the 3 hour wait, 1 hour hair wash out and herbal smell. As I'm writing this it seems to me like most of you are going to think this process is dreadful, but it isn't, I just think it isn't worth the time and effort if your just looking to condition your hair and not dye it.

***

   Se faria isto de novo? Provavelmente não, eu apenas comprei a henna pelas suas propriedades de hidratação surpreendentes e embora o produto da Lush tenha alcançado esse objectivo , para mim não vale a espera de 3 horas, uma hora para lavar o cabelo e o cheiro de ervas. Enquanto escrevo isto parece-me que a maioria de vocês vão pensar que este processo é terrível, mas não é, eu só acho que não vale a pena o tempo e o esforço se apenas procura hidratação para o seu cabelo e não tingi-lo.


What do you guys think? It feels a lot smoother and softer.

***
O que acham? Sinto que está mais suave e sedoso.


Friday, March 22, 2013

Bioderma Sébium Review


  In one of my past posts, I promised to review the Bioderma Sébium on it's own, and well, here it is. Ask yourself how many brands of make-up remover have you ever tried, your answer may be from anywhere between 3 to 10, and this is where your search stops. I've heard so many good things about Bioderma for the past year or so that I decided to purchase it myself, and let me tell you I wasn't at all disappointed. I was lucky enough to purchase the 250ML at the sale price of $17.49 CAD at Shopper's Drug Mart. You might consider it a less affordable product compared to what you're used to using, but I can guaranty you that it is worth every penny you spend on it. It removes your make-up like it's no trouble and leaves your skin feeling soft and fresh once you've taken it all off!
***
   Num dos meus últimos posts, prometei rever o Bioderma Sébium ,e bem, aqui está. Pergunte-se quantas marcas de removedor de maquilhagem já experimentou, a resposta pode ser qualquer coisa entre 3 a 10, e é aqui que a sua busca acaba. Já ouvi muitas coisas boas sobre Bioderma durante todo o ano que passou, por isso decidi comprá-lo eu mesma, e deixe-me dizer que não estou nada decepcionada. Tive a sorte de comprar o 250ML pelo preço de venda de CAD $ 17,49 Shopper's Drug Mart. A verdade é que pode considerar um produto menos acessível em comparação com o que está habituada a usar, mas posso garantir que vale cada cêntimo que gasta. Remove a maquilhagem sem problema algum e deixa a pele macia e fresca !


   As you can see in the image above, most of the make-up came off on the first cotton pad, the other two were mainly off my nose, but I still wiped the rest of my face before targeting that area. I simply adore this product, I definitely recommend it to all my friends at any chance I get! Try it out for yourself and let me know what you think!

***

   Como pode verificar na imagem acima, a maior parte da maquilhagem saiu na primeira rodela de algodão, os outros dois continham maquilhagem essencialmente do meu nariz, mas limpava todo o rosto antes de voltar ao nariz . Simplesmente adoro este produto, recomendo a todas as minhas amigas a qualquer oportunidade que tenha! Experimente por si mesmo e diga-me o que achou!


Wednesday, March 20, 2013

Cetaphil Cleanser & Daily Moisturizer SPF 15 Review - Post Sobre Creme de Lipeza & Creme Hidratante c/ FPS da Cetaphil


http://img2.timeinc.net/instyle/images/2010/GalxMonth/03/cetaphil-300.jpg
   Since the very first day I started using my Olay Pro-X Cleansing System I've always matched it up with my Garnier Pure Control Exfo-Brusher, but yesterday I decided to purchase the Cetaphil Gentle Cleanser, since my other cleanser was finishing up. There is only one thing I'm not very fond of - the lather, I was used to my old one getting all soapy and bubbly on my face while using the system, but not with Cetaphil, but I guess I can live with that because I absolutely love the way it feels on my skin, it's so gentle yet effective, as soon as I apply it on my face, I feel instant smoothness and softness, even when I get out the shower! Just a great product at an average price, hopefully it won't make me break out. I purchased it at Walmart for 19$CAD.

***

   Desde o primeiro dia que comecei a usar o meu sistema de limpeza facial da Olay Pro-X ,sempre o acompanheicom o meu Garnier Pure Control Exfo-Brusher, mas ontem decidi comprar o creme de limpeza suave da Cetaphil , já que o da Garnier estava prestes a terminar. Só há uma coisa que eu não gosto muito - a espuma, ou devo dizer a falta dela?! Estava habituada ao da Garnier, e ficar toda ensaboada e cheia de espuma no meu rosto ao usar o sistema, mas não com o Cetaphil, mas penso que consigo viver com isso, porque simplesmente adoro o estado que ele deixa a minha pele, é muito muito suave porém eficaz, assim que applico no meu rosto, sinto uma suavidade instantânea , mesmo após de sair do chuveiro! Apenas Um excelente produto por um preço médio, espero que não me faça borbulhas. Comprei no Walmart por 19 $ CAD.


   I also purchased the Cetaphil Daily Moisturizer SPF 15, which is quite nice. It doesn't feel greasy on your skin and hydrates your skin even in the toughest winters! The only downside was rubbing my eye and having my eye water and I felt some pain.Great winter moisturizer with SPF in it, one of my favorites! Also from Walmart for about 14$CAD.

***

   Também comprei o Cetaphil Creme Hidratante Diário FPS 15,que é bastante agradável. Não faz com que a sua pele fique oleosa e hidrata muito bem a sua pele, mesmo naqueles invernos mais difíceis! A única desvantagem foi quando esfreguei o meu olho e de imediato os meus olhos começaram a chorar senti algum ardor . Um creme maravilhoso com FPS , um dos meus preferidos! Também do Walmart por cerca de 14 $ CAD.

Monday, March 18, 2013

Olay Pro-X Advanced Cleansing System Review


    So after my general gather on cleansing systems, I decided to grab hold of Shopper's Drug Mart Sale on the Olay Pro-X Advanced Cleansing System for only $27.99 and give it a shot. The box itself was very light, as I was walking home, I was asking myself if there was actually something in it, and yes there was.
The packaging is very neatly placed and displayed in the simplest way and includes two Duracell AA batteries, one brush head, the cleansing system itself and a trial sample of the Olay Pro-X Exfoliating Renewal Cleanser.
   The system isn't heavy at all, nor too light may I add, the brush head was what really surprised me! Every time I saw reviews or any other material on the Olay Cleansing System, I thought the bristles would be too harsh and hurt my skin, and the thought of not having other types of brush heads - like the Clarisonic System, just frightened me! But I calmed down once I took the brush head out of the box, they're super soft with just enough rigidness to get that squeaky clean feeling, nothing like toothbrush bristles. I had some trouble with getting the bottom cap off, but with a strong pull it will easily come off.
***
   Depois do meu post geral sobre os sistemas de limpeza facial, decidi aproveitar a promoção da Shopper's Drug Mart o sistema de limpeza da Olay Pro-X Advanced por apenas $ 27,99 e dar-lhe uma oportunidade. A caixa em si é muito leve, enquanto caminhava para casa, questionei se realmente havia algo dentro da caixa e claro que havia. A embalagem está muito bem organizada e exposta de uma forma simples e inclui duas pilhas Duracell AA, uma cabeça da escova, o sistema de limpeza em si e uma amostra experimental do Olay Pro-X Exfoliating Renewal Cleanser. 
  O sistema não é nem muito pesado nem muito leve, a cabeça da escova foi o que realmente me surpreendeu! Cada vez que eu lia comentários ou qualquer outro material sobre o Sistema de Limpeza da Olay, pensava que a escova seria demasiado dura e iria ferir a minha pele, e só o facto de saber que não existem outros tipos de cabeças de escova - como o Sistema da Clarisonic, só me assustava ainda mais! Mas acalmeiassim que tirei a cabeça da escova fora da caixa, as fibras são super macias mas com a rigidez suficiente para ter a sensação de pele limpa, nada parecido com uma escova de dentes. Tive alguns problemas para colocar as pilhas na parte de baixo, mas com um forte puxão irá sair facilmente.

DAY 1 - (PM) Used in the shower, I mixed the trial cleanser with some drops of my Garnier Pure Control Exfo-Brusher and exfoliated for 10 seconds on my cheeks, and 20 on my chin, nose and forehead.
My skin felt amazingly clean, but I didn't really notice any difference on my pores, and the army of blackheads remained the same.

DAY 2 - (AM) Used under the sink, used only the trial cleanser alone. Once again felt my skin squeaky clean, but this time I noticed my blackheads were less noticeable, but sadly still there.
             (PM) Used in the shower, once again I mixed the trial cleanser with some drops of my Garnier Pure Control Exfo-Brusher my blackheads were much less visible than the second time I used the cleansing system, but still visible...

DAY 3 - From here on I used the system over the sink in the (AM) with the Garnier Pure Control Exfo-Brusher and the same cleanser in the (PM) but in the shower.

***
1º DIA - (PM) Utilizado no chuveiro, misturei a amostra do creme de limpeza experimetal com algumas gotas do meu Garnier Pure Control Exfo-Brusher e fiz a esfoliação durante 10 segundos nas minhas bochechas, e 20 no meu queixo, nariz e testa.
A minha
pele ficou incrivelmente limpa, mas não notei qualquer diferença nos meus poros, e o exército de pontos negros permaneceu igual.

2º DIA - (AM) Usado sob a pia, utilizado apenas a amostra do creme de limpeza experimental . Mais uma vez, senti que a minha pele estava absolutamente limpa, mas desta vez notei que os meus ponto negros eram menos visíveis, mas, infelizmente, ainda existem.
             (PM) Usado no chuveiro, mais uma vez misturei a amostra do creme de limpeza exprimental com algumas gotas do meu Garnier Pure Control Exfo-Brusher os meus pontos negros eram muito menos visíveis do que da segunda vez que usei o sistema de limpeza, mas ainda assim visíveis ...

3º DIA - A partir de agora usei o sistema sobre a pia de (AM) com o Garnier Pure Controle Exfo-Brusher e o mesmo de (PM), mas no chuveiro.


   It took me exactly 7 days to get noticeably better looking skin, sadly my camera wasn't working at the time,but I can assure you that I got the exact same results as the leading competitor, the Clarisonic. I got this image directly from their website, and as you can see, the image on the right side makes buying the Clarisonic system even more appealing, but with a $30CAD price tag you can achieve the same results. My for head was so much worse than the image on the left, full of little bumps and minor pimples that would see-through my make-up, but now all of it is gone, every single bit! My make-up glides on beautifully and it only took me a week for my skin to clear up and I never thought it would be possible!
 

   Demorei exactamente 7 dias para obter uma pele visivelmente melhor , infelizmente a minha máquina fotográfica não funcionava nessa altura, mas posso garantir-vos que obti os mesmos resultados que o líder da concorrência, o Clarisonic. Retirei esta imagem diretamente do website deles, como se pode ver, a imagem do lado direito faz com que o sistema do Clarisonic seja mais apelativo, mas com um preço de $30CAD pode obter os mesmos resultados. A minha testa estava muito pior do que a imagem da esquerda, cheio de pequenas bolhinhas e borbulhas que conseguia ver através a minha maquilhagem, mas agora tudo se evaporou ! A minha maquilhagem desliza na minha cara maravilhosamente e só demorou uma semana para que a minha pele se purificasse e eu nunca pensei que seria possível!


   Sadly the OLAY Pro-X system didn't do much for the blackheads on my nose, if anything really, but I'm still going to use this amazing system both in the morning and evening. Hopefully I'll find a match for my blackheads soon.
***

   Infelizmente o sistema da OLAY Pro-X não fez muito para os pontos negros no meu nariz , mas irei continuar a usar este sistema impressionante tanto na parte da manhã como à noite. Espero encontrar uma solução para os meus pontos negros em breve.

Friday, March 8, 2013

My DIY Waxing Kit - O Meu Kit de Depilação DIY (SALLY'S BEAUTY SUPPLY)


   After my post about getting your own DIY waxing kit, I stepped into Sally's Beauty Supply and got myself a kit! I was initially going to purchase either the Gigi Honee Wax Warmer or the Clean + Easy Deluxe Pot Wax Warmer, but I saw an amazing deal on their flyer and was sold!
   It's the Suddenly Smooth Wax Warmer by Jilbere for only 39,95 $CAD that includes a Free wax of your choice, an instructional DVD and a 50 pack of their large non-woven strips.


   Depois do meu post sobre obter o seu próprio kit de depilação DIY, entrei na loja da Sally's Beauty Supply e comprei o meu próprio kit! Inicialmente ia comprar o aquecedor da Gigi - O Honee Wax Warmer ou o Clean + Easy Deluxe Pot Wax Warmer, mas vi uma incrível oferta no seu folheto e fquei rendida!
    É o aquecedor de cera Suddenly Smooth da marca Jilbere por apenas 39,95 $ CAD que inclui uma cera gratis a sua escolha, um DVD educacional e uma embalagem de 50 das suas tiras de muselin.


       TOTAL SPENT = 138.40$CAD (Tax Included)

   Be sure to get yours by the 31st of March and don't bother printing out the coupon online, I did and the cashier didn't even ask for it, she simply scanned the in store flyer and that was it! Make sure you have one of their reward cards too, so you'll be able to purchase the items you need, for less.


   Certifique-se de adquirir o seu até o dia 31 de Março e não se incomode em imprimir o cupão on-line, pois eu fi-lo e nem sequer me pediram nada ,ela simplesmente pegou no folheto da loja e pronto! Informe-se tambem sobre os cartões de recompensa, assim, poderá comprar os artigos que precisa por menos.